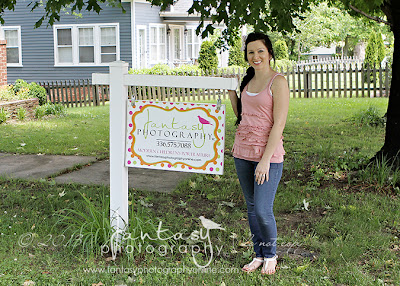
D-I-Y Outdoor Retail Signage - the new colorful(er) studio sign!
Okay, so I'm not a big fan of commitment when it comes to my studio sign, business cards or other marketing materials. Yes, they all coordinate, but I do like to change up my designs from time-to-time (yearly!). With that being said, I never EVER change my logo, or my logo's colors. More on that subject later.
Materials Needed:
Two Lawn Signs (or one if you're doing a one-sided sign)
1/2 inch Plywood
Saw (or get the hardware store to cut your plywood for you)
Liquid Adhesive (high strength/outdoor quality)
Clear Silicone Caulking
Vinyl Trim & Nails
Sign Post & Hangers
Husband who likes doing projects :-)
I admit, I love Vistaprint. I designed my signs myself and uploaded my files, or you can use one of their pre-made designs. I ordered my two large lawn signs from there for under $10 each, free shipping and I got 6% cash back through Ebates. I LOVE Ebates, too - almost any online shopping you do can be done using Ebates click-through, you get cash back and there's NO catch - honest! I got back $67 from my holiday shopping this year! If you're interested in signing up, just follow this link - ebates.com -, you'll get a new member sign-up bonus (cash or giftcard) and I'll get a referral credit, too!
Here we go. I am updating and replacing my outdoor retail signs from last year with polka dots and a more colorful, fun design, so I already have most of the work done. I'll still go through the steps start-to-finish for you.
1. Cut plywood to the exact same size as your lawn signs. Or have your husband do it fo you :-) Your local hardware store might even do it for you, too.
2. Apply a high strength liquid adhesive to one-side of the plywood and line-up the edges so that they are all flush. Smooth the sign onto the plywood using light pressure with your hand, then peel it off and set it aside face-down with adhesive exposed to activate the adhesive. Follow instructions according to label on adhesive.
3. After suggested time has lapsed, re-apply sign to plywood and press firmly to remove as much air as possible and get a good bond, again making sure your sides and corners line up and are flush.
4. Repeat for other side if making a double-sided sign.
5. Cut vinyl trim to size and wrap and nail around edges. Sorry I didn't post a pic of this step - I did it the first time around!
6. Apply a thin bead of clear silicone caulking to seal edges between sign and vinyl edging, as well as corners of sign were the vinyl meets and smudge with finger. Let dry.
7. Attach hardware and hang.
So easy, looks awesome and is inexpensive on the business budget!
FIN :-)
Call the studio at 336.575.7088 or visit our website -
Winston Salem Newborn Photographers Fantasy Photography, LLC


No comments:
Post a Comment